SDR: How to listen to satellites, digital radio systems, and more
About two years ago, I got a video recommended to me by YouTube that had an especially interesting proposition: it showcased $20 device that claims to be able to listen to frequencies from 25 MHz – 1750 MHz. That was hard to believe, but the video I was watching was from a channel I had been watching for a while, so I looked into these devices more.
Most of the YouTubers showcasing these devices were using them for simple things, like picking up FM radio or even listening for aircraft going overhead. For $20, I thought this could be fun so I got the Nooelec NESDR Mini, which is pretty much the cheapest general-purpose SDR you can buy from a reputable company (although the Aliexpress options are 1/2 the price and work almost as well for the average user).
When it arrived, it came with a driver CD and a page of information—but nothing really helpful. That’s fine, because there’s a whole community who’s already done much more documentation on the features of these devices than most manufacturers ever do.
After 10 minutes, everything was working. I used the driver installer (Zadig) from the Nooelec website, and SDR# was easily found on the Airspy website. At the time, I had a prebuilt Asus PC, which was a problem: the front panel USB ports weren’t usable. This is probably due to Asus throwing in a cheap USB controller as a cost saving measure. I was thus confined to the motherboard’s USB ports.
The next day I was running programs to listen to ADS-B communications from airplanes, and even with the stock antenna (tuned to 433 MHz, I think?) I was able to pick up planes 40 miles away at cruising altitude from indoors. I’m surrounded by walls and trees, and a good hill or two, but I could still get strong signals with this $20 device.
I lost interest in tracking planes and exploring my RF environment after a week or two, and the SDR was forgotten.
Rediscovering SDR
Two years later (December 2018) I started to think about using my SDR again. But, this time, I wanted an SDR that was better quality and would be less susceptible to interference overall. So, I went with the $32 Nooelec NESDR SMArTEE bundle. Besides the nice aluminum case and greatly increased heat transfer ability provided by this device, I got this for the antenna kit it came with. The connector on the dongle is an SMA connector, which I knew was much more common and easy to work with than MCX connectors. Plus, the cable going to the antenna is longer and more sturdy (RG56), so I could put the antenna farther away from my PC.
I immediately started checking out the programs I had used two years earlier, making sure to update them as needed. I had just upgraded my PC months early to a Ryzen CPU, and the speed increase over an OEM-only CPU like the FX8310 I had before was very nic. Other than the dangerous StoreMI program, my new computer was handling the SDR very nicely.
When I booted up SDR#, I was easily able to connect my NESDR and start using it… at for a few minutes, once. It never worked again on my computer.
I wouldn’t find this out until months later (read: days before writing this post), but the root cause of this issue is that the new Ryzen chips have moved to a more System-on-Chip approach, which means that most of the USB controllers are actually within the processor itself, and not on the motherboard. This thread was incredibly helpful, and the .rar archive (I backed it up here in case that forum link breaks, credit to user DX888) contains an alternate rtlsdr.dll file that works. It still didn’t work even when I tried compiling the driver from the Github repo, so I can say with certainty that DX888 has the only working fix for Ryzen users at this time.
This problem seems to be exclusive to SDR#, as CubicSDR and HDSDR both worked for me on my Windows 10 system. However, most plugins that are developed for Windows are made for SDR#, so this is a big problem.
The other workaround is the rtl_tcp.exe file that Osmocom includes in their “rtl-sdr-release” file available for download. By running the exe, you can connect to your SDR in SDR# without needing a custom driver like I previously listed. However, it seems to be very slow, buggy and barely works.
I was pretty busy around the beginning of 2019, so my new Nooelec was forgotten even quicker this time around.
Re-rediscovering SDR (New Inspiration)
June comes around. I’m back at my internship, and this guy comes in to talk about RF. He spends almost two hours speaking about LNAs, filters, antennas, and how microphone setups work in live event environments. At one point, he even demonstrated how he can use his expensive RF spectrum analyzer to visually see what channels might be open to use on the few remaining frequency bands. I learned quite a bit, and I was reminded that I too have the ability to interact with a huge portion of the RF spectrum.
I was gone the next week on a trip, but when I got back, I quickly started investigating more with my new knowledge and inspiration. A few YouTube videos later, I learned that cities and counties now use these wide-open digital radios to transmit voice to each other for things like police/fire/EMS dispatch and much more. So, naturally, I look into what I can do.
As it turns out, my city uses a P25 trunked system, with 90% of the channels unencrypted. The instructions I was reading from multiple online posts indicated that the best way to decode P25 transmissions is with two SDRs and some software called DSDPlus. I downloaded the program, plugged my two RTL-SDR devices into my PC, and started the .bat files included with my download. And… nothing. A whole lot of nothing. I checked CubicSDR, and sure enough, I was actually receiving these signals—they just weren’t being decoded.
After a lot more research, I determined that the best way to get this to work was to pay $25 for the Fastlane version of DSDPlus. I figured that there was a decent chance I could get some of that money back if the program didn’t work, or I could at least help the developer(s) add support for my system, because I’m probably not the only one having issues with software that seems to only be (publicly) updated once every 18 months.
So, when the email arrived maybe 50 minutes later saying that I now have Fastlane access, I was pretty excited, if not a bit nervous that it may be just as broken. I ran the stock .bat files, no modifications, and it worked perfectly. I could hear random medical details about someone having a very bad day. Out of respect for the privacy of my fellow human-beings, I immediately searched something along the lines of “how to listen for specific channels in DSDPlus / how to exclude certain channels in DSDPlus”. Needless to say, I’ve heard very few semi-private transmissions since I lowered the priority of all medical/hospital related channels.
Over the course of four hours on a Friday night in July, I collected 1,500 audio recordings. Some of them are people accidentally pressing the “transmit” button on their radio, resulting in a useless 5kB file on my computer. Others are more intentional but equally boring: an officer talking about how he is changing lanes and turning left to follow a random car. Only a few of these recordings are actually interesting, like the guy using the grass of a public park as a restroom.
I didn’t stay interested in the P25 decoding for more than few days, however, because it felt a little weird listening to that stuff, and hearing the public library transmissions made it exceptionally dull.
Discovering Satellite Broadcasts
The weekend immediately following that Friday night, I discovered something even more interesting: satellite broadcasts.
Now, when I first started learning about these miracle radio devices, I always heard the person writing the post or filming the YouTube video mention something about how easy it can be to record data from satellites with a simple SDR. I never thought much of it, and I usually just ignored those claims – after all, I have zero access to any place to install a big antenna, and any pass with an elevation under 5 degrees on the south side, and maybe 15 degrees on the north side, will be attenuated by trees and a small hill. So what chance would I have at recording a satellite? I’ve watched Iridium flares and ISS passes at night—those move fast! I can’t track that!
Well, as it turns out, I don’t need any equipment besides a PC. In my research, I noticed a little “Online SDR” button on the Airspy website. I thought, at first, that they could be offering a web version of SDR#, which could alleviate some of my USB woes (which were yet unresolved). I was totally wrong. Under my nose this entire time has been a service where people across the globe can let other random people use their radio equipment for free. Sometimes it’s really high quality gear! And since Airspy makes SDR#, all you have to do is copy and paste the sdr:// URI into SDR#. The input field for that string only appears when you select “Spy Server Network” as your device, instead of RTL-SDR (USB) or similar.
After spending a day trying to figure out how to use VB Cable (I was overthinking it!), and how to setup WXtoIMG to all run in coordination with SDR#, I figured it out. I was happy to find a wonderful setup from someone who is “located in a rural area just outside of Edmonton, Alberta, Canada.” This person usually has no one else connected to their Airspy HF+, and my connection to their computer is really strong, so I can make use of this 56′ vertical wire and discone antenna. They have a really low noise floor with their device, so they must be doing something right! Thanks to this service and that user, I can easily decode images from NOAA -15, -18 and -19, as well as LRPT images from Meteor M2 and M2-2 without even touching either of my SDRs.
I don’t know who this person is at all, and they have no contact information, but I really wish I could thank them. Or just have their antenna setup. Or both?
SDR# doesn’t have output device control for audio, so I have to go into Windows settings and change the default sound output device to VB Cable’s virtual “speakers”. Remember not to play music or let Windows play any noises while you’re recording. Then I set my location in WXtoIMG so it can give me more useful pictures when I’m all done. You don’t need Orbitron, really, but it does make a difference in image quality, and it is definitely easier than trying to adjust for the Doppler effect yourself. I use it because it is much easier than using this satellite tracking site all the time.
With a successfully-orchestrated setup of software, and a fast connection to “my” SDR, I was able to get this image on my first try:
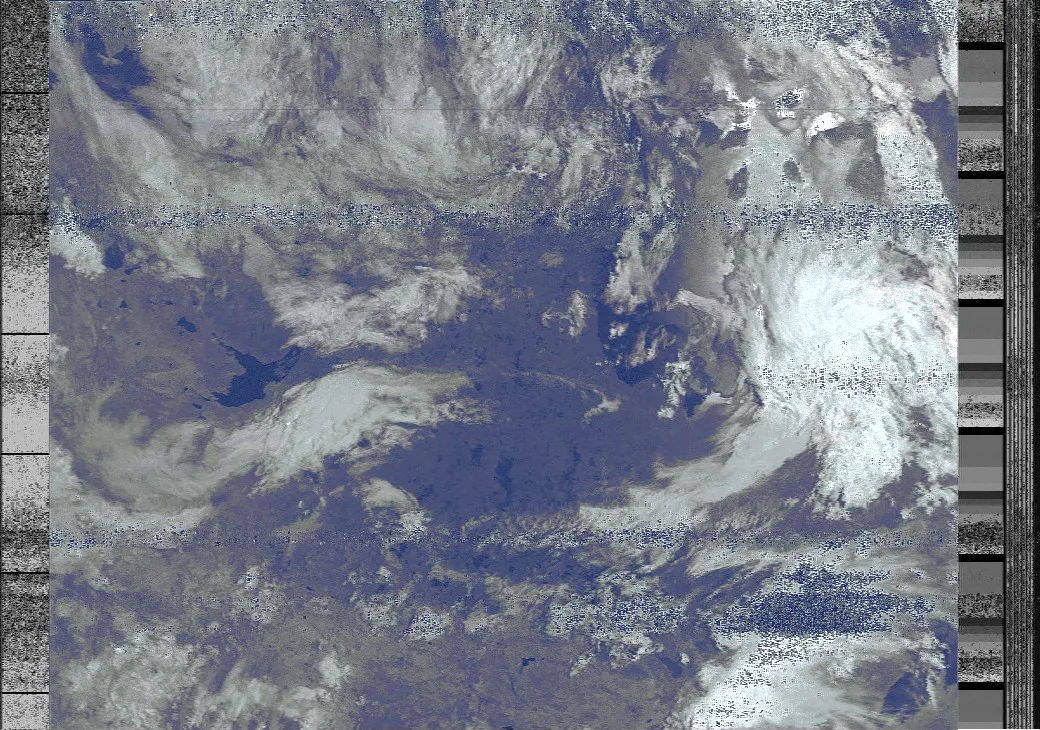 This is Canada. I think Thunder Bay starts in the top right quadrant.
See the bars on the side? My bandwidth was set to 40,000 Hz, which is too much. 35,000 Hz bandwidth is the best.
Every attempt before that was a total failure, so it was nice to have my first successful run turn out so well. Later that day, I even got a partial scan of Tropical Storm Barry.
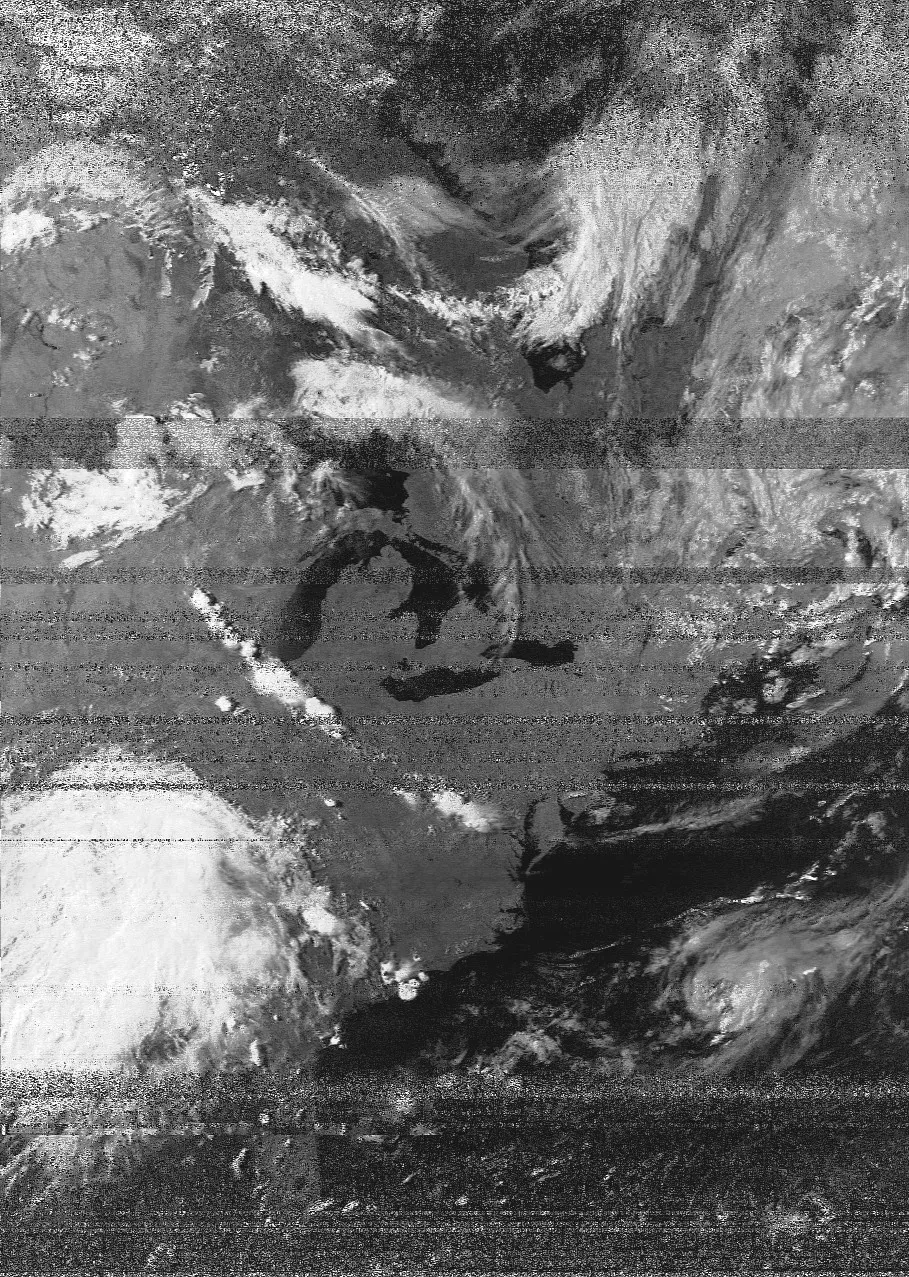 Tropical Storm Barry
 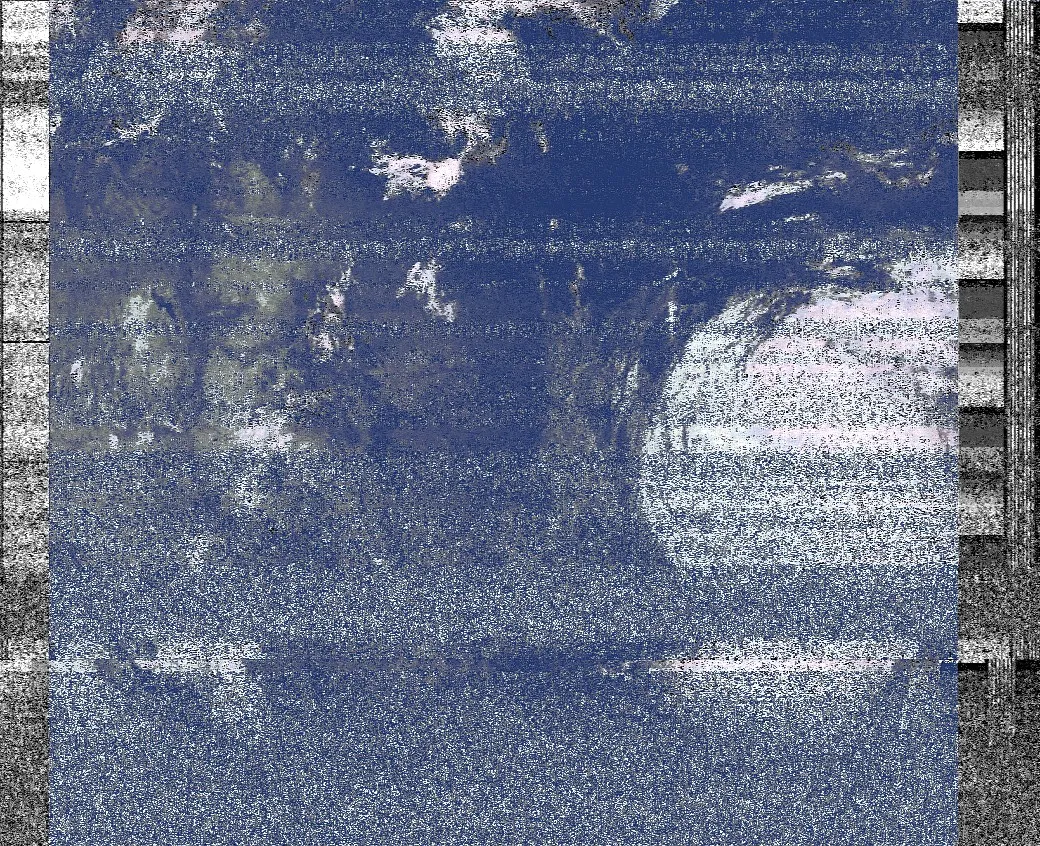 East Coast of the United States
I spent the next four days obsessing over this, trying to figure out how I can receive these images. What I learned is taht a V Dipole antenna is good enough. When my RTL-SDR.com Blog V3 comes this week, with its V Dipole, I’ll make a new post. I have been busy, so I didn’t have much time to try making my own antenna or anything, but I would also need an adapter to get any custom antenna hooked up to my SDR.
One thing I learned from my very first SDR is that you actually need two different lines for an antenna: one is the ground, and the other is the “actual” antenna. With shielded cables, the shielding goes to the ground part and the inner core is hooked up to the “actual” antenna part. My ISP left a bunch of Type F male-to-male cables a few years ago, and said they were “extra” and that we “wouldn’t need them, ever”. Part of my order this week is some adapters, so I can butcher those cables for use with any custom antenna, or at least to extend my current setup further.
I tried making a V Dipole myself by unraveling a metal coat hanger, bisecting it, and using a cardboard box to hold it together. Then, I used the antenna that came with my NESDR Mini to connect the sketchy antenna. The stock antenna has a magnetic bottom that is easily accessible, and inside of it you’ll find the wire is split into one part for the antenna screw, and the other part goes to a poorly glued in metal base. With some alligator clips, I connected my homebrew antenna, and tried angling it for some passes of NOAA and Meteor satellites. No dice. Ignoring the fact that I’m indoors, the actual antenna elements are heavily bent from their years as a hangar. The cardboard barely maintains a 120 degree angle between them, and they aren’t quite even. Also, their length is about 2-3 inches too short for 137 MHz. Despite those (major) shortcomings, I received about 2 seconds of a NOAA APT transmission, so I guess I wasn’t too far off!
Meteor images are much more fun than NOAA APT images. They’re higher resolution, easier to receive (once you’ve locked on to the carrier frequency, at least), and they don’t look as bad when your signal is weak. Installing the plugin for SDR# is super easy, especially if you’ve already gotten DDE plugin for Orbitron integration. From there, you just have to make sure you save the decoded data to a file (one of the settings in the plugin), and feed it into LRPTOfflineDecoder. The version distributed by happysat77 on Reddit seems to be the only version that works for the new M2-2 satellite, and the other version floating around seems to be the only variant that works on the older M2 satellite.
With the image created by the decoder, I like to send it into SmoothMeteor next. It returns a less distorted image at the cost of some fairly minor artifacts near the edges, and everything is more square like a standard image.
 Before SmoothMeteor…
  … and after!
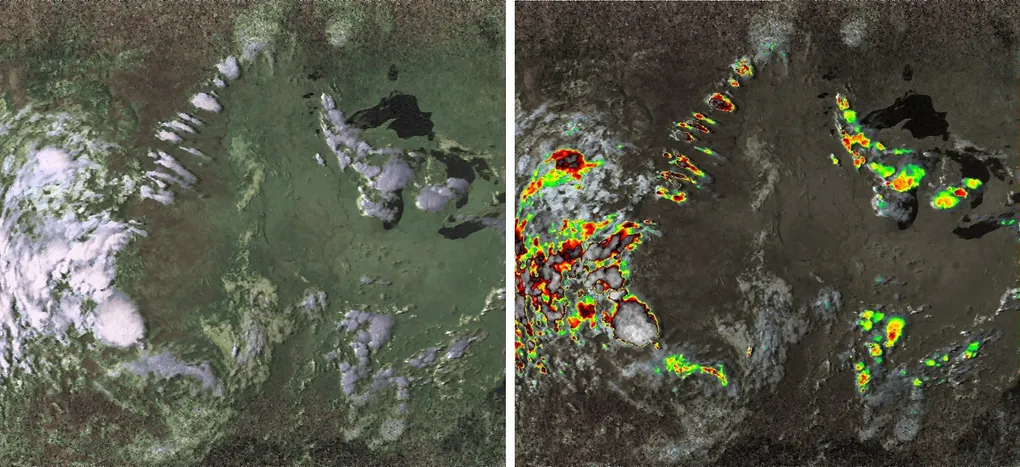
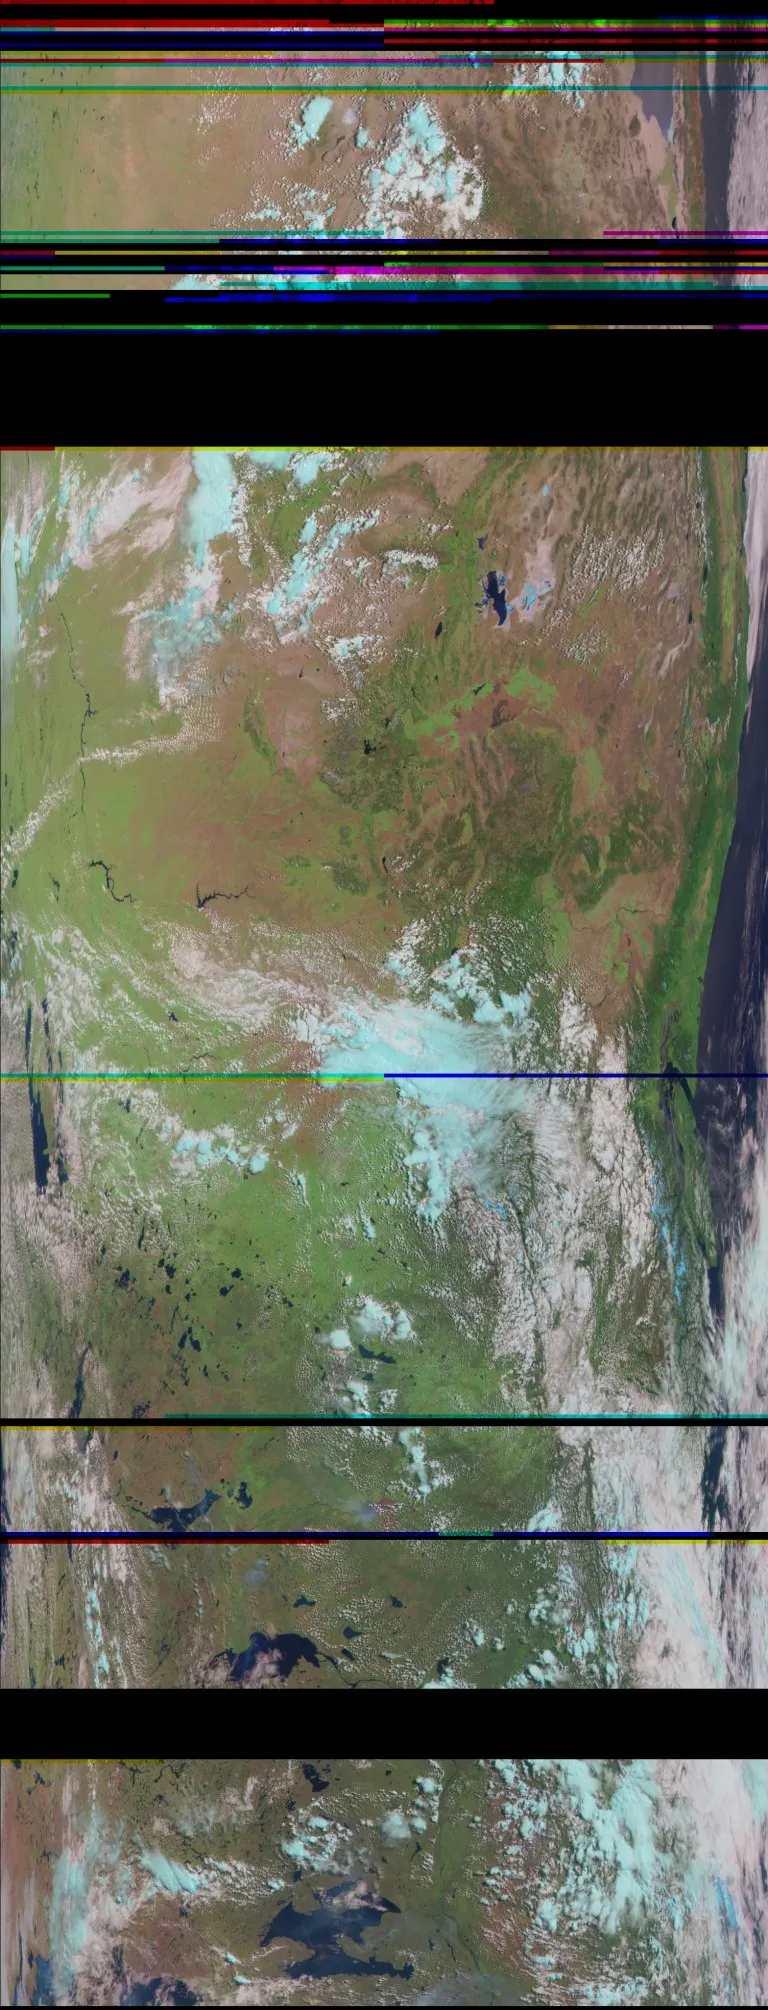
Then, I use the LRPTImageProcessor distributed by the makers of SatSignal (which must be installed to use the image processor). This gets me outputs like what WXtoIMG produces – colorful interpretations of the different data from the different sensors. It’s the final step to a good Meteor image, and should not be forgotten. I’ve posted some good images below.
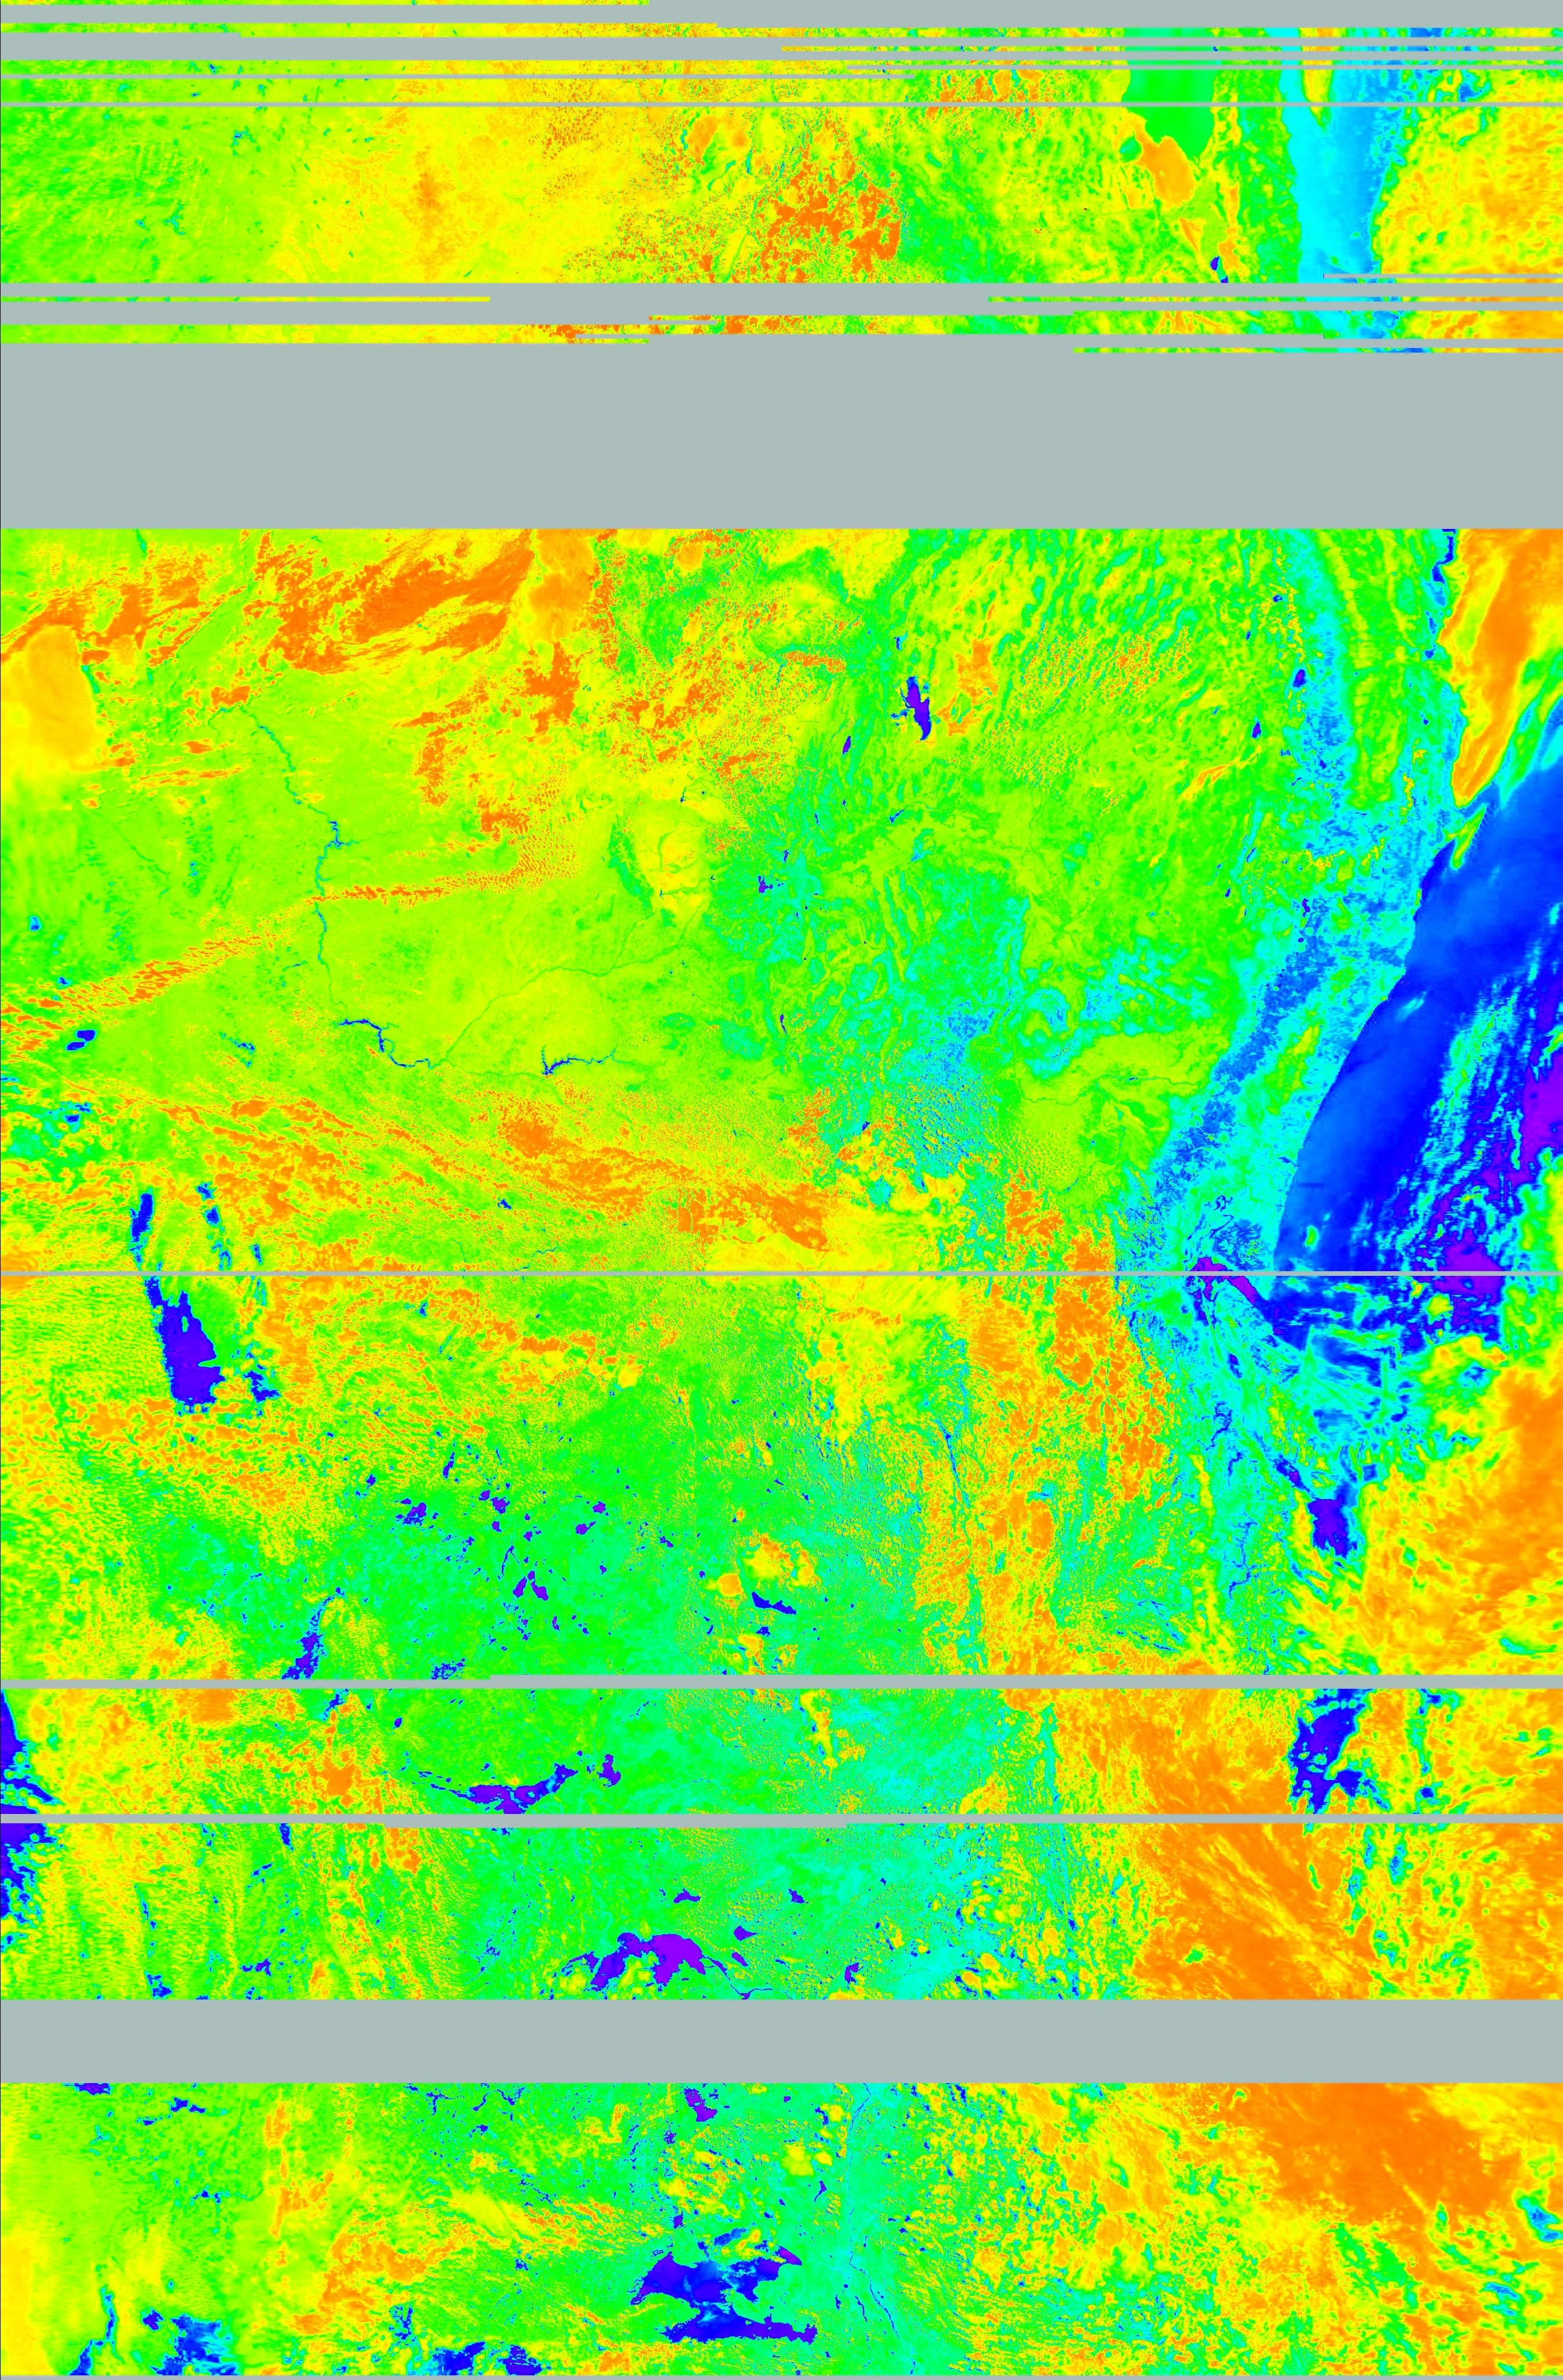 Image from M2-2 (Launched just last month!)
 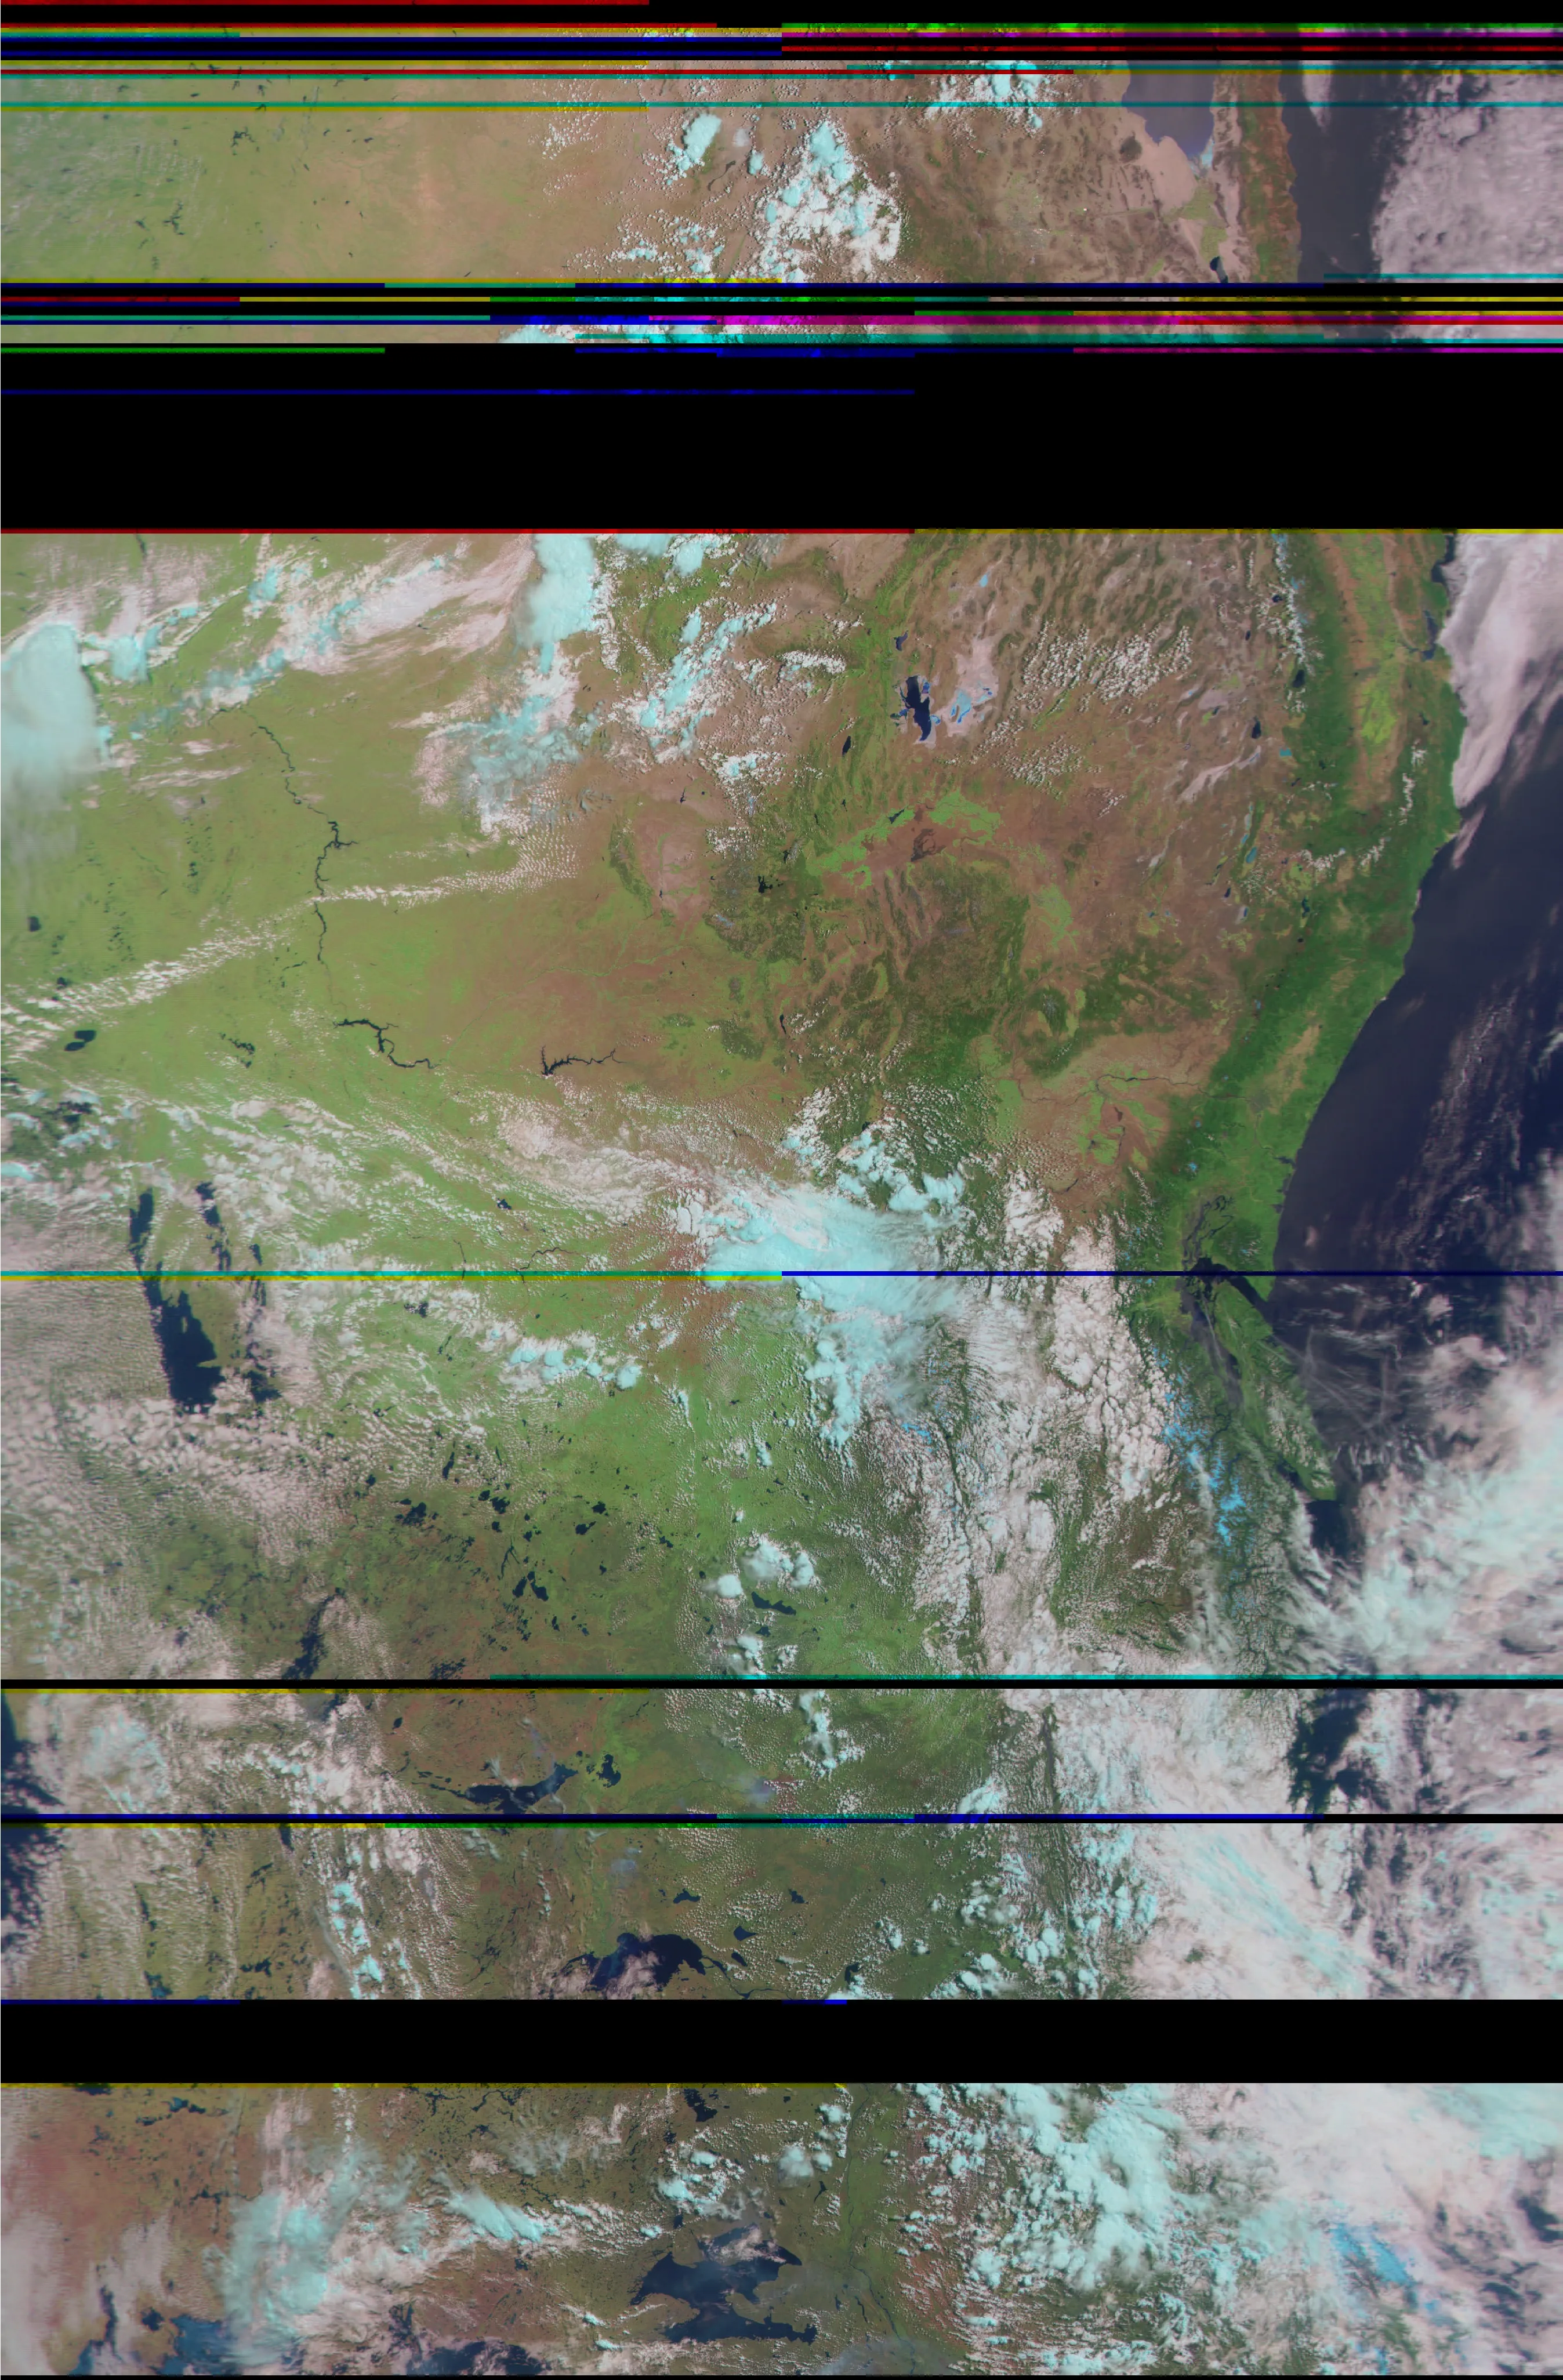 After remapping
  Thermal filter enabled
Note that the first one is from the M2-2, while the other two pictures are different color filters on an M2 pass.